> For the complete documentation index, see [llms.txt](https://amfdocs.mftlabs.io/llms.txt). Markdown versions of documentation pages are available by appending `.md` to page URLs; this page is available as [Markdown](https://amfdocs.mftlabs.io/agile-messaging-framework/tutorials/usecases/uc16.md).

# UC16

**CD --> SFG --> AMF  --> S3**&#x20;

**Use Case:** Partner31 (Sender) send files to SFG via CD protocol, we use GZIP and Deliver those files to the Partner32 (Receiver) using S3 protocol via AMF (Agile Messaging Framework).&#x20;

**Sequence Diagram:**

<figure><img src="https://529847091-files.gitbook.io/~/files/v0/b/gitbook-x-prod.appspot.com/o/spaces%2F3lEcft4Hj193xOMx83Gm%2Fuploads%2Fr3EECTk70sa6gfVspjEF%2FUC16.drawio.png?alt=media&amp;token=fa051b4a-b018-48ae-847c-842174956fa9" alt=""><figcaption></figcaption></figure>

**Steps:**&#x20;

A. Onboard Partner31 in SFG via AMF and Partner 32 in AMF.&#x20;

B. Onboard Partner31 connect direct node in SFG using AMF (Customer Initiated Communication Profile (Inbound)).&#x20;

C. Create Message Type or use the existing one in AMF.&#x20;

D. Create Message Mapping with Sender, Receiver and Message Type with a file pattern.

E. Create GZIP Action as Action Type.

F. Create Delivery Action or use the predefined one (Deliver as is).

G. Create Workflow Definitions and add Actions (Created in **step E** and **step F**) as step1 and step2 respectively.

H. Create Workflow Rule with Sender, Receiver, Message Type and Workflow Definition name (Created in **step G**).

I. Onboard Partner32 S3 Profile using AMF (MFT Initiated communication Profile (Outbound))

J. Create Communication Rule with Sender, Receiver, Message Type and Comm Profile Name.

K. Verify the Message Activity in AMF once the Partner31 uploads the file to SFG via CD protocol. If everything was configured correctly, the file will be delivered to Partner32 via S3 protocol.&#x20;

**Process:**

**A. Onboard Partner31 and Partner32 in SFG via AMF:**

Login to AMF

!\[Graphical user interface, application

Description automatically generated]\(/files/hgD6zTgGkDrpPnOc2YH6)

Go to Onboarding -> Users

!\[Graphical user interface, application

Description automatically generated]\(/files/ZX64qPfovwhol78uKo9A)

Click on + icon at the top right corner

!\[Graphical user interface, text, application, Word

Description automatically generated]\(/files/f5oxlLNfyhd1K1wEvJ1l)

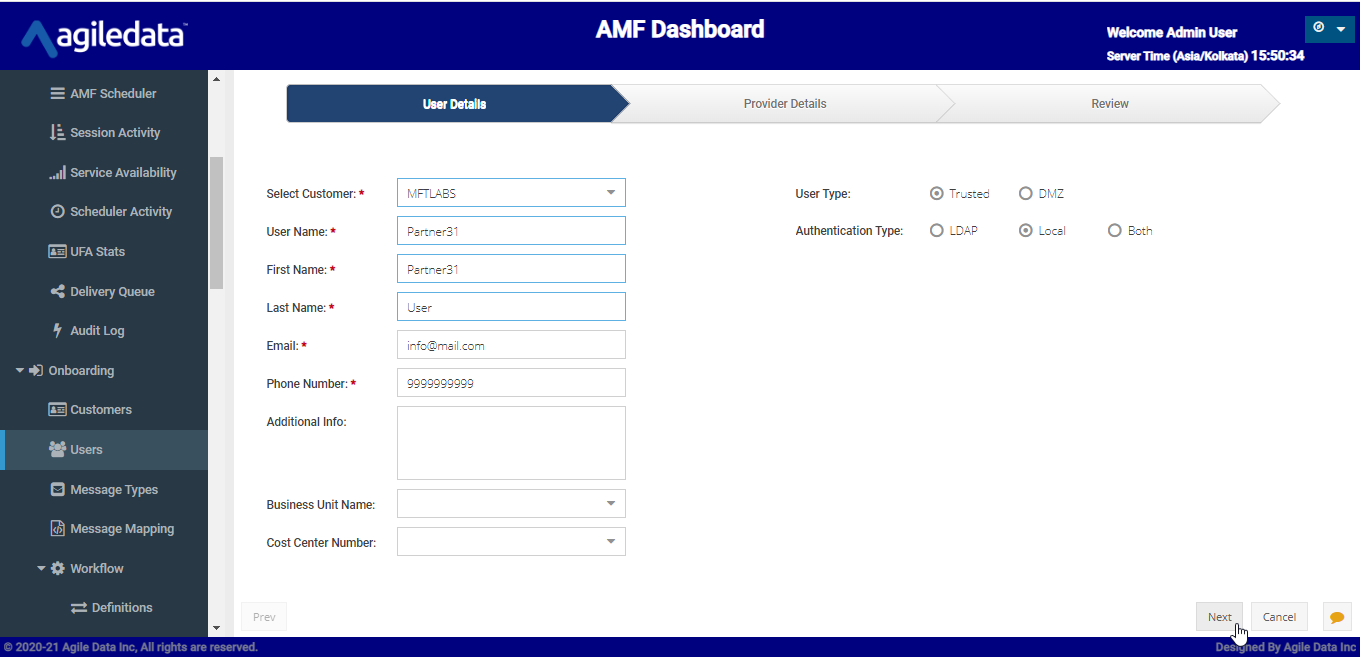
Select Customer and give details of Partner31, select User Type, Authentication Type and click next.

1. **User Type**: Which Zone does the partner belong to send or receive files? (DMZ or Trusted)
2. **Authentication Type**: Where we store the partner credentials? (LDAP or local (SFG/AMF) or Both)

<figure><img src="https://529847091-files.gitbook.io/~/files/v0/b/gitbook-x-prod.appspot.com/o/spaces%2F3lEcft4Hj193xOMx83Gm%2Fuploads%2FnhyECpATGn7THS388vHx%2F3.png?alt=media" alt=""><figcaption></figcaption></figure>

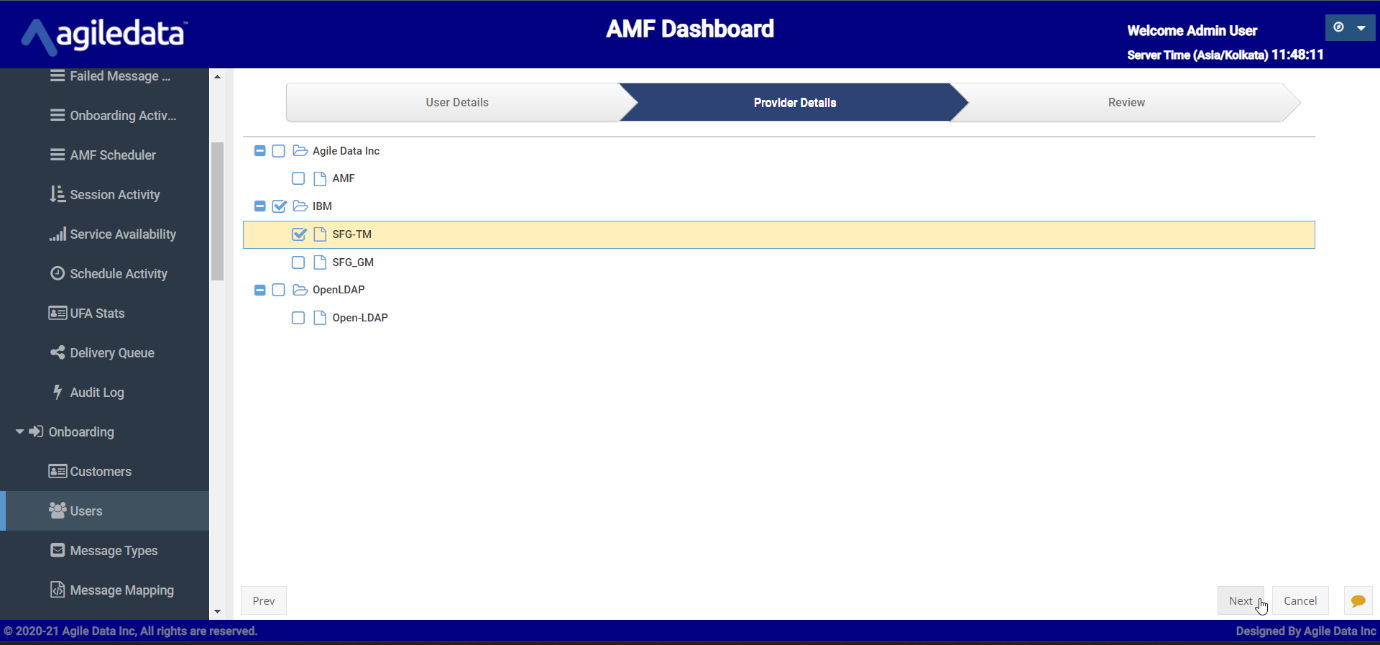
Select the provider the Partner belong to and click next

1. **AMF:** AMF provider is used to onboard Partners which use UFA
2. **IBM:** This will come from the provider’s config. We can choose several types based on the provider's config.
3. **Open Ldap:** We need to select this if we selected the Authentication Type as LDAP in the step&#x32;**.**

<figure><img src="https://529847091-files.gitbook.io/~/files/v0/b/gitbook-x-prod.appspot.com/o/spaces%2F3lEcft4Hj193xOMx83Gm%2Fuploads%2FZrNfATRQDFREWqj83jw0%2F4.png?alt=media" alt=""><figcaption></figcaption></figure>

Verify the Partner details and click **Onboard User**.

!\[Graphical user interface, text, application, email

Description automatically generated]\(/files/NYbjINw63dOW3zPTPt8i)

Repeat the above steps to Onboard Partner32.

**B. Onboard Partner31 Connect Direct nodes in SFG using AMF (Customer Initiated Communication Profile (Inbound)).**

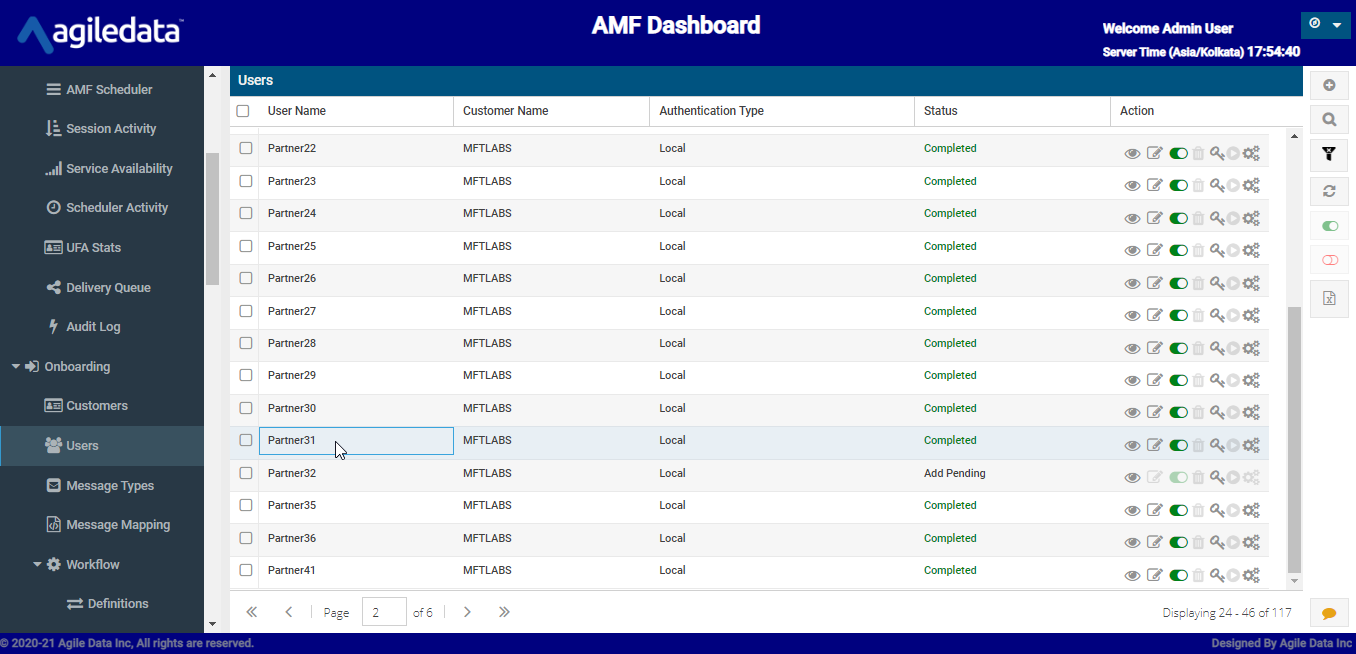
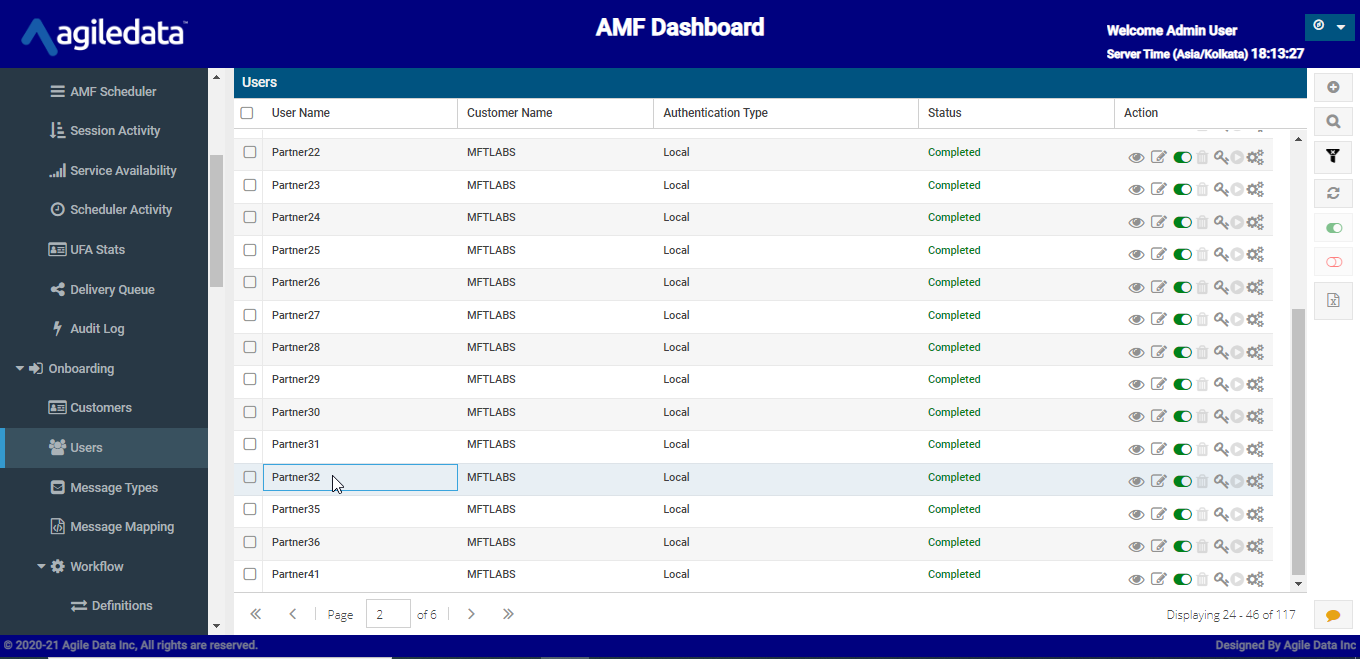
Double click on the Partner31

<figure><img src="https://529847091-files.gitbook.io/~/files/v0/b/gitbook-x-prod.appspot.com/o/spaces%2F3lEcft4Hj193xOMx83Gm%2Fuploads%2FvD2kdugzPbkCiHYOfo0D%2F6.png?alt=media" alt=""><figcaption></figcaption></figure>

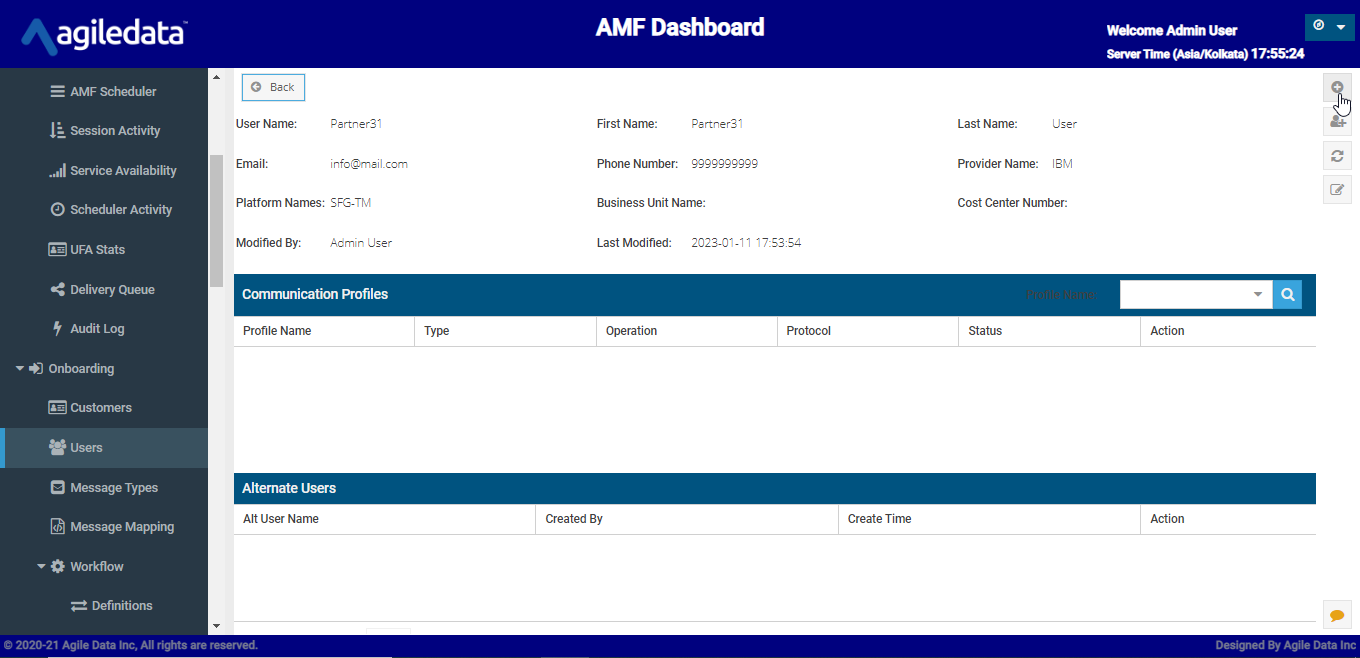
Click on + icon in the top right corner

<figure><img src="https://529847091-files.gitbook.io/~/files/v0/b/gitbook-x-prod.appspot.com/o/spaces%2F3lEcft4Hj193xOMx83Gm%2Fuploads%2FYWt8VG49qO5sglETC3CZ%2F7.png?alt=media" alt=""><figcaption></figcaption></figure>

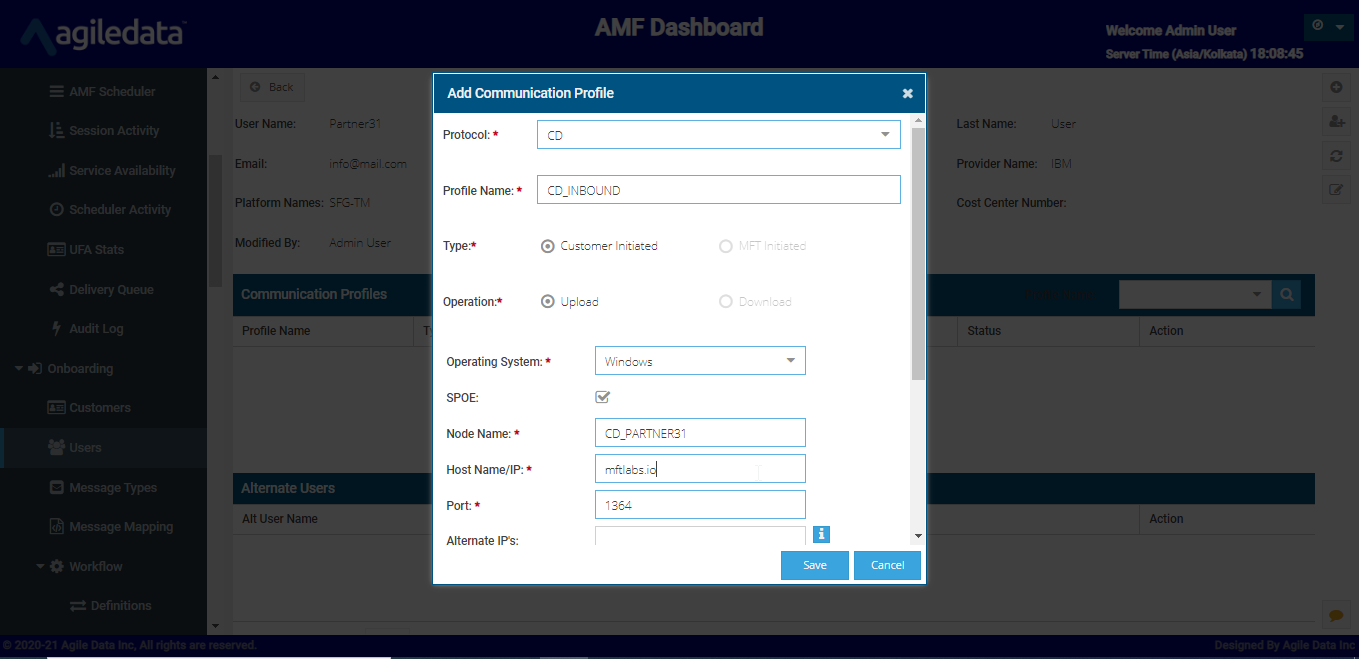
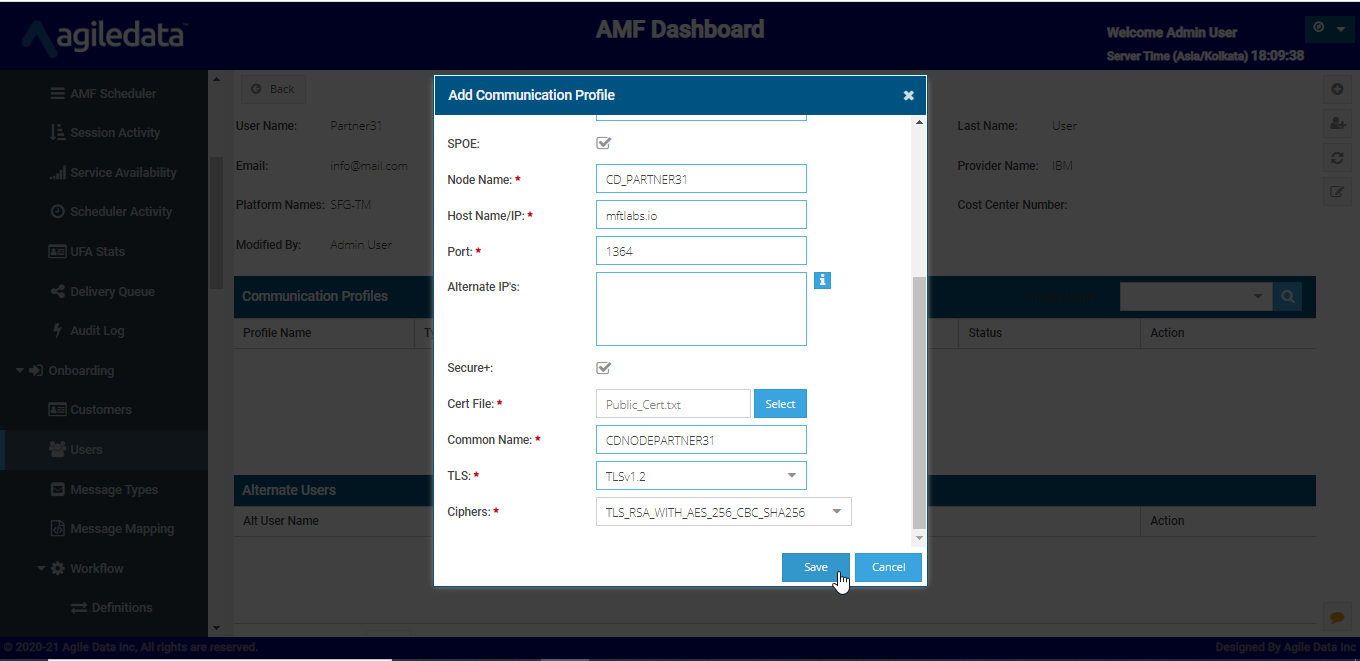
Give details of the Node and click save

<figure><img src="https://529847091-files.gitbook.io/~/files/v0/b/gitbook-x-prod.appspot.com/o/spaces%2F3lEcft4Hj193xOMx83Gm%2Fuploads%2FBN5xiIgfs61eZo1su1e0%2F8.png?alt=media" alt=""><figcaption></figcaption></figure>

<figure><img src="https://529847091-files.gitbook.io/~/files/v0/b/gitbook-x-prod.appspot.com/o/spaces%2F3lEcft4Hj193xOMx83Gm%2Fuploads%2Fn12YAPRuzcmmGE15utet%2F9.png?alt=media" alt=""><figcaption></figcaption></figure>

<figure><img src="https://529847091-files.gitbook.io/~/files/v0/b/gitbook-x-prod.appspot.com/o/spaces%2F3lEcft4Hj193xOMx83Gm%2Fuploads%2FXIQRUptB1vcZLt0nOIXY%2F10.png?alt=media" alt=""><figcaption></figcaption></figure>

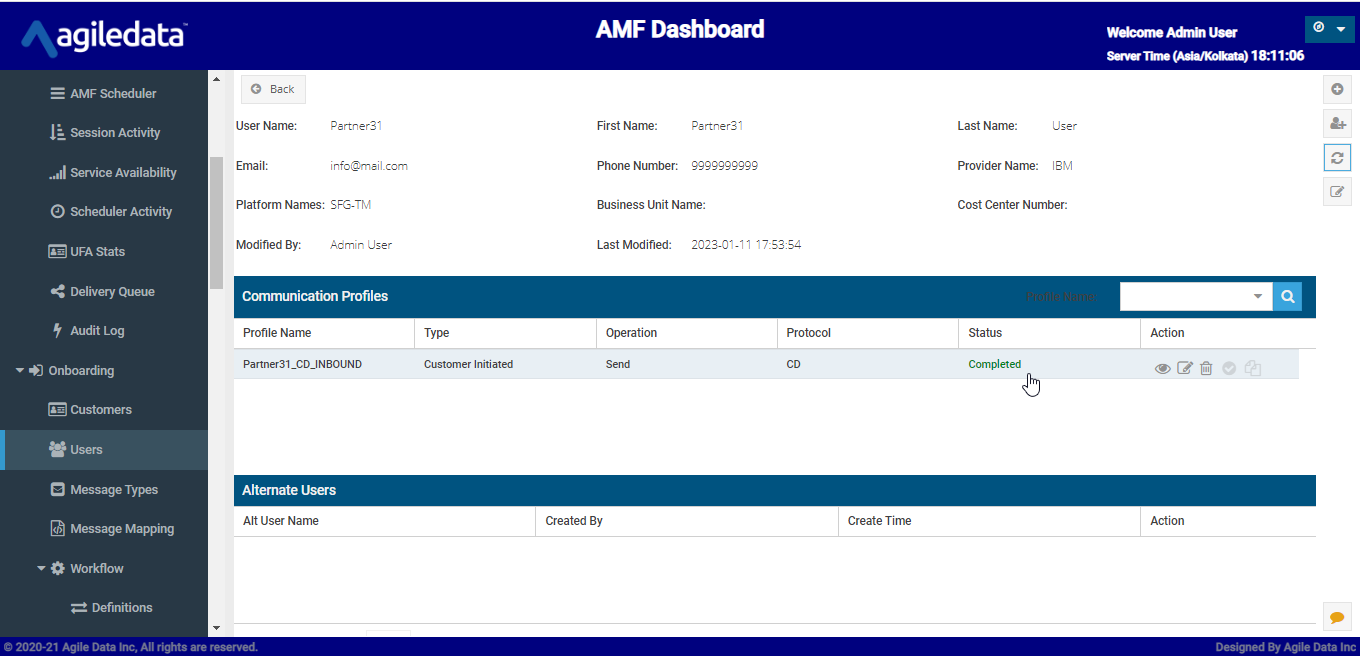
Once the onboarding was done, we can see the status as completed.

Give the details and click Save

1. **Operating System:** Operating system of the Partner31
2. **SPOE**: Option to enable/disable Secure point of entry
3. **Node Name:** Node name of Partner31
4. **Host Name/IP:** Host/IP of the Partner31 CD node
5. **Port:** Port of the Partner31 CD node
6. **Alternate IPs:** we can give there are any alternate IPs for this CD node
7. **Secure+:** Option to enable/disable secure+ for SSL (If secure+ was enabled)
8. **Cert File:** Public cert of the Partner31 CD node (In txt format with no headers) (If secure+ was enabled)
9. **Common Name:** Common name of the Partner31 CD (If secure+ was enabled)
10. **TLS Version:** TLS version to be used in the Communication (If secure+ was enabled)
11. **Ciphers:** Ciphers to be used in the Communication (If secure+ was enabled)

**C. Create Message Type or use the existing one in AMF:**

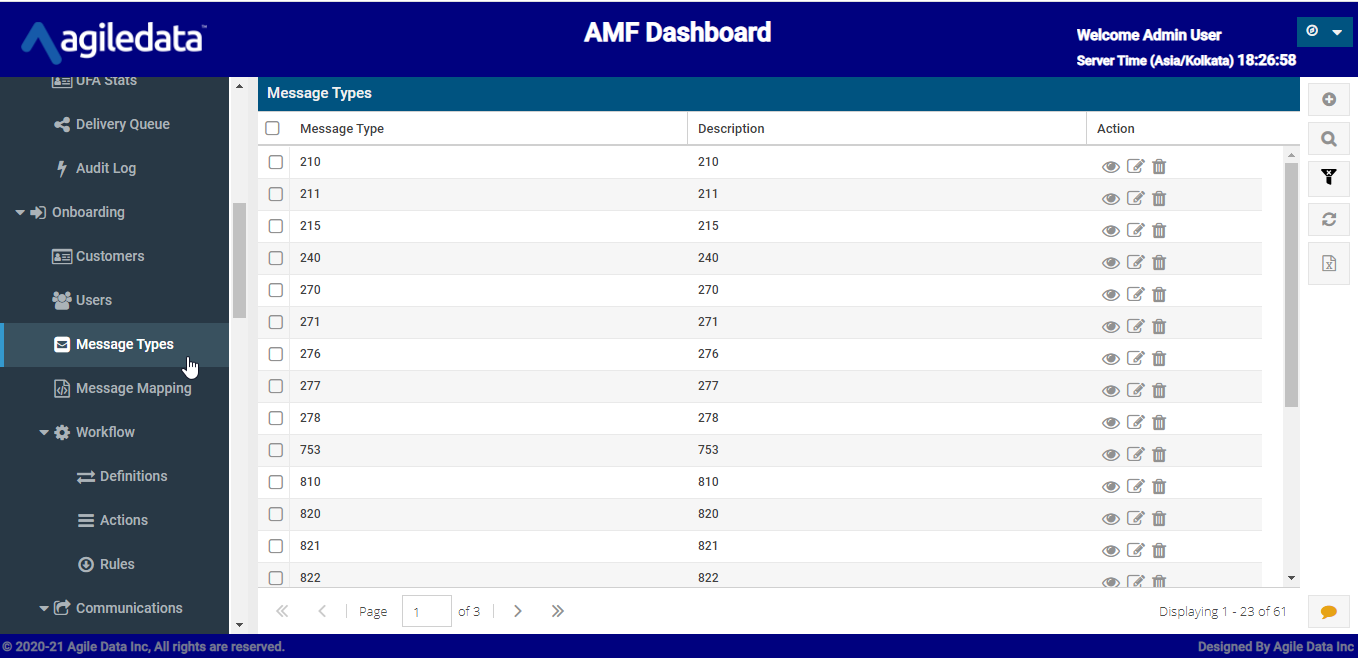
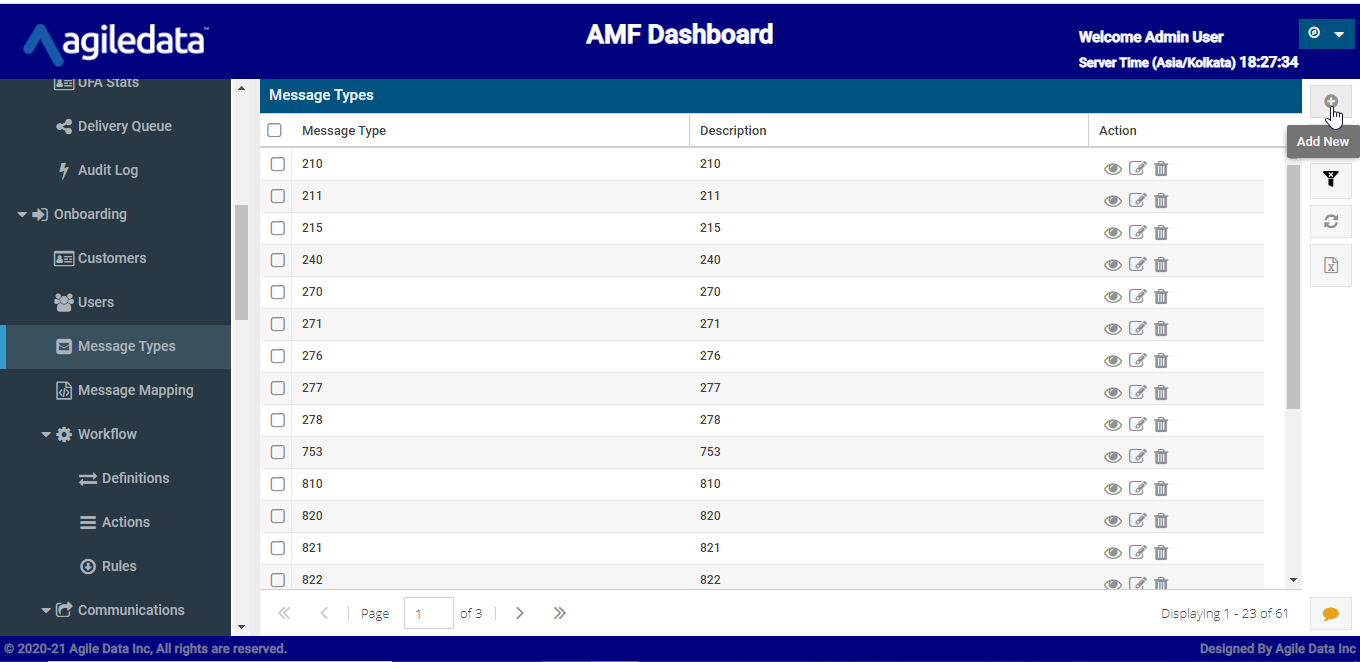
Go to Message Types under Onboarding

<figure><img src="https://529847091-files.gitbook.io/~/files/v0/b/gitbook-x-prod.appspot.com/o/spaces%2F3lEcft4Hj193xOMx83Gm%2Fuploads%2FwpB3KcYNoPz81ueGsvAb%2F11.png?alt=media" alt=""><figcaption></figcaption></figure>

Click on + icon in the right corner to add a new Message Type

<figure><img src="https://529847091-files.gitbook.io/~/files/v0/b/gitbook-x-prod.appspot.com/o/spaces%2F3lEcft4Hj193xOMx83Gm%2Fuploads%2FKquCInYhbM2bVinkyuLa%2F12.png?alt=media" alt=""><figcaption></figcaption></figure>

**Note**: In this scenario we will use the existing Message Type (GENERIC)

**D. Create Message Mapping with Sender, Receiver and Message Type with a file pattern:**

Go to Message Mapping under Onboarding

![](https://529847091-files.gitbook.io/~/files/v0/b/gitbook-x-prod.appspot.com/o/spaces%2F3lEcft4Hj193xOMx83Gm%2Fuploads%2FO2dbHEWi2DGMIEo0iniN%2F13.png?alt=media)

Click on +icon at the top right corner

![](https://529847091-files.gitbook.io/~/files/v0/b/gitbook-x-prod.appspot.com/o/spaces%2F3lEcft4Hj193xOMx83Gm%2Fuploads%2FIVeNXsprNNEEPsSACQIj%2F14.png?alt=media)

Select Sender, Receiver and Message Type give pattern of the files that Partner31 will send and Click Save.

![](https://529847091-files.gitbook.io/~/files/v0/b/gitbook-x-prod.appspot.com/o/spaces%2F3lEcft4Hj193xOMx83Gm%2Fuploads%2FuUCqV9NsLkFsfendx5Hm%2F15.png?alt=media)

**E. Create GZIP Action as Action Type.**

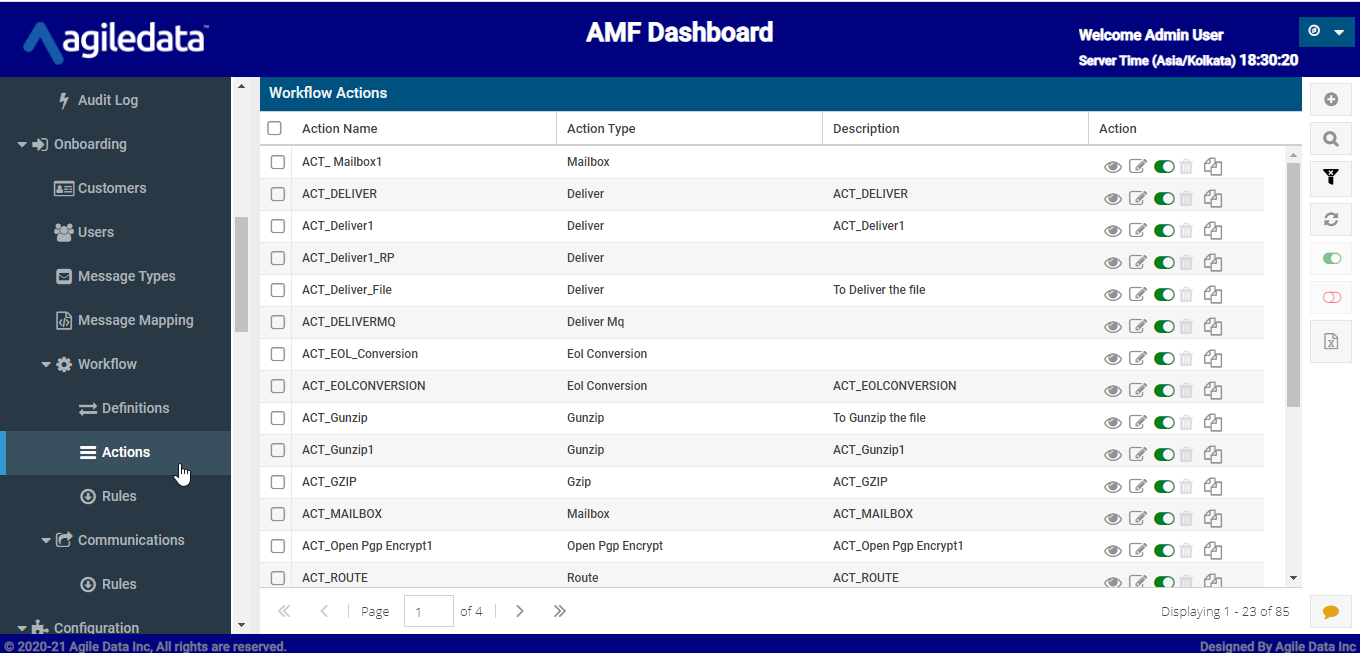
Go to Actions under Onboarding->Workflow

<figure><img src="https://529847091-files.gitbook.io/~/files/v0/b/gitbook-x-prod.appspot.com/o/spaces%2F3lEcft4Hj193xOMx83Gm%2Fuploads%2FnvZQy0nusG8NsfasskU2%2F16.png?alt=media" alt=""><figcaption></figcaption></figure>

Click on + icon to create new action

![](https://529847091-files.gitbook.io/~/files/v0/b/gitbook-x-prod.appspot.com/o/spaces%2F3lEcft4Hj193xOMx83Gm%2Fuploads%2FENMQU6BolrNLOwpMRIAF%2F17.png?alt=media)

Create GZIP Action as Action Type and click save

![](https://529847091-files.gitbook.io/~/files/v0/b/gitbook-x-prod.appspot.com/o/spaces%2F3lEcft4Hj193xOMx83Gm%2Fuploads%2FmRpfgHVgwNqXhtmgxXT1%2F18.png?alt=media)

**F. Create Delivery Action or use the predefined one (Deliver as is):**

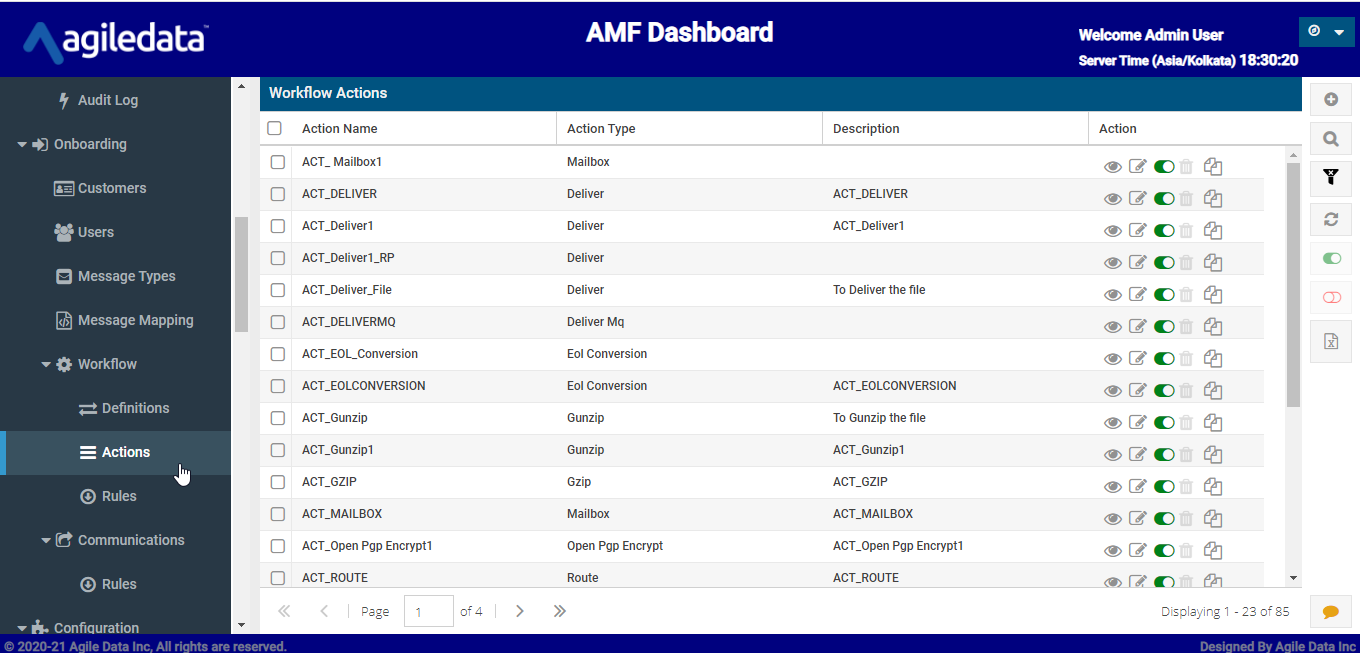
Go to Actions under Onboarding->Workflow

<figure><img src="https://529847091-files.gitbook.io/~/files/v0/b/gitbook-x-prod.appspot.com/o/spaces%2F3lEcft4Hj193xOMx83Gm%2Fuploads%2FHeOMm2jj94Z0Z9CvusQe%2F19.png?alt=media" alt=""><figcaption></figcaption></figure>

Click on + icon to create new action

![](https://529847091-files.gitbook.io/~/files/v0/b/gitbook-x-prod.appspot.com/o/spaces%2F3lEcft4Hj193xOMx83Gm%2Fuploads%2Fnuy4jL60zkQnz5KUk3dd%2F20.png?alt=media)

**Note**: In this scenario we will use the existing Action (Deliver as is)

**G. Create Workflow Definition and add Actions (Created in step E and step F) as step1 and step2 respectively.**

Go to Definitions under Onboarding->Workflow

![](https://529847091-files.gitbook.io/~/files/v0/b/gitbook-x-prod.appspot.com/o/spaces%2F3lEcft4Hj193xOMx83Gm%2Fuploads%2F9L1UabsXNDTbKM33B9K7%2F0.png?alt=media)

Click on + icon at the top right corner

![](https://529847091-files.gitbook.io/~/files/v0/b/gitbook-x-prod.appspot.com/o/spaces%2F3lEcft4Hj193xOMx83Gm%2Fuploads%2FFGyScPRDaA1xmoG22nK6%2F1.png?alt=media)

Give Workflow Name, Description and clicks save

![](https://529847091-files.gitbook.io/~/files/v0/b/gitbook-x-prod.appspot.com/o/spaces%2F3lEcft4Hj193xOMx83Gm%2Fuploads%2F1uqc2SKYoBrE2i0bUDms%2F2.png?alt=media)

Double click on the Workflow Definition Name

![](https://529847091-files.gitbook.io/~/files/v0/b/gitbook-x-prod.appspot.com/o/spaces%2F3lEcft4Hj193xOMx83Gm%2Fuploads%2F0AxvWv7Rl6uBvwPNGZDa%2F3.png?alt=media)

Click on the + icon at the top right corner

![](https://529847091-files.gitbook.io/~/files/v0/b/gitbook-x-prod.appspot.com/o/spaces%2F3lEcft4Hj193xOMx83Gm%2Fuploads%2FrAfcBUZNzlq6dWUDie4X%2F4.png?alt=media)

Select the action that we created in **step E** as step1 and click save.

![](https://529847091-files.gitbook.io/~/files/v0/b/gitbook-x-prod.appspot.com/o/spaces%2F3lEcft4Hj193xOMx83Gm%2Fuploads%2Fsw4dKI0XbGLnfY07d7kK%2F5.png?alt=media)

Select the action that we created in **step F** as step2 and click save

![](https://529847091-files.gitbook.io/~/files/v0/b/gitbook-x-prod.appspot.com/o/spaces%2F3lEcft4Hj193xOMx83Gm%2Fuploads%2FoT9IRTxe5bulJKNwfl8Q%2F6.png?alt=media)

![](https://529847091-files.gitbook.io/~/files/v0/b/gitbook-x-prod.appspot.com/o/spaces%2F3lEcft4Hj193xOMx83Gm%2Fuploads%2FQ6Zk1aDPcViWfdoobmYi%2F7.png?alt=media)

**H. Create Workflow Rule with Sender, Receiver, Message Type and Workflow Definition name (Created in step G).**&#x20;

Go to Rules under Onboarding -> Workflow

![](https://529847091-files.gitbook.io/~/files/v0/b/gitbook-x-prod.appspot.com/o/spaces%2F3lEcft4Hj193xOMx83Gm%2Fuploads%2F6aUMlbLMMa4CrDukMnNk%2F8.png?alt=media)

Click on + icon at the top right

![](https://529847091-files.gitbook.io/~/files/v0/b/gitbook-x-prod.appspot.com/o/spaces%2F3lEcft4Hj193xOMx83Gm%2Fuploads%2FU3CUdM2JfpXwZtq3Y4Z4%2F9.png?alt=media)

Give Sender, Receiver and Message Type and Workflow (Created in **step G**) and clicks save

![](https://529847091-files.gitbook.io/~/files/v0/b/gitbook-x-prod.appspot.com/o/spaces%2F3lEcft4Hj193xOMx83Gm%2Fuploads%2F9Ov8rRyaeTc7WBjfhruH%2F10.png?alt=media)

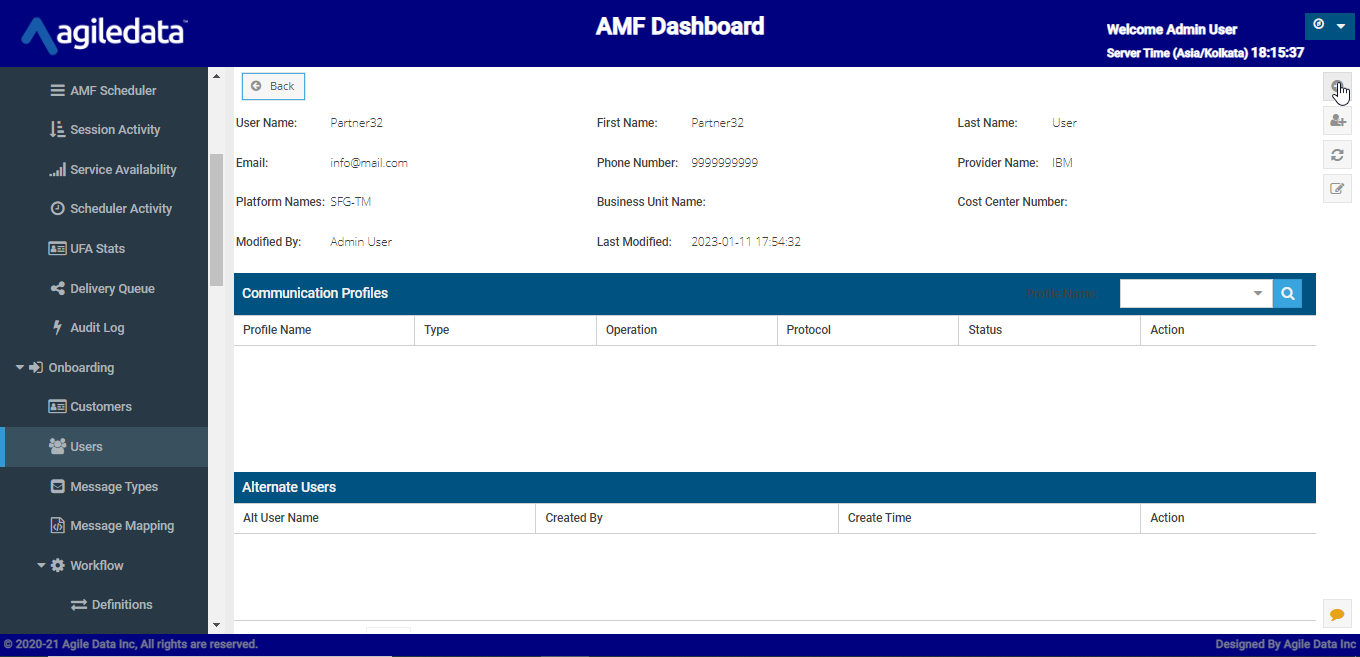
**I.  Onboard Partner32 S3 profile in SFG using AMF (MFT Initiated Communication Profile  (Outbound))**

Double click on the Partner32

<figure><img src="https://529847091-files.gitbook.io/~/files/v0/b/gitbook-x-prod.appspot.com/o/spaces%2F3lEcft4Hj193xOMx83Gm%2Fuploads%2FxLbp0I1YpzyIuR2i13tQ%2F11.png?alt=media" alt=""><figcaption></figcaption></figure>

Click on + icon in the top right corner

<figure><img src="https://529847091-files.gitbook.io/~/files/v0/b/gitbook-x-prod.appspot.com/o/spaces%2F3lEcft4Hj193xOMx83Gm%2Fuploads%2Fz3YV1Cu5DrEyGJjG8MHK%2F12.png?alt=media" alt=""><figcaption></figcaption></figure>

Give details of the Node and click save

![](https://529847091-files.gitbook.io/~/files/v0/b/gitbook-x-prod.appspot.com/o/spaces%2F3lEcft4Hj193xOMx83Gm%2Fuploads%2FFcpInsmLicWCW2gTUgnT%2F13.png?alt=media)

![](https://529847091-files.gitbook.io/~/files/v0/b/gitbook-x-prod.appspot.com/o/spaces%2F3lEcft4Hj193xOMx83Gm%2Fuploads%2FiBqRHtIZzTfbGNDcoj5z%2F14.png?alt=media)

Give details and click save

1. **S3 bucket**: S3 Bucket name
2. **S3 Region**: Region where S3 belongs
3. **S3 Access Key ID:** Access key ID of the S3 bucket
4. **S3 Secret Key:** Secret key of S3 bucket
5. **Message to Process**: Option to process the original or current message
6. **Proxy Required:** Option to open connections via proxy server
7. **Proxy URL:** Proxy server URL (If proxy was enabled)
8. **Proxy User Name**: Proxy user name (If proxy was enabled)
9. **Proxy Password**: Proxy password (If proxy was enabled)
10. **Upload Path:** Path to upload files
11. **Cleanup on Delivery:** Option to clean the file in file system after the file was delivered (Once the file is cleaned, we cannot redeliver the file again)

![](https://529847091-files.gitbook.io/~/files/v0/b/gitbook-x-prod.appspot.com/o/spaces%2F3lEcft4Hj193xOMx83Gm%2Fuploads%2FFGNwWVECJa5sl2FhWd4D%2F15.png?alt=media)

Once the onboarding was done, we can see the status.

**J .Create Communication Rule with Sender, Receiver, Message Type and Comm Profile Name:**

Go to Rules under onboarding->communication

![](https://529847091-files.gitbook.io/~/files/v0/b/gitbook-x-prod.appspot.com/o/spaces%2F3lEcft4Hj193xOMx83Gm%2Fuploads%2FOzob6ASJ7wov3OBGdDoY%2F16.png?alt=media)

Click on + icon at top right corner

![](https://529847091-files.gitbook.io/~/files/v0/b/gitbook-x-prod.appspot.com/o/spaces%2F3lEcft4Hj193xOMx83Gm%2Fuploads%2FYuxLz8gW7CebdqVvA17f%2F17.png?alt=media)

Select Sender, Receiver, Message Type and Comm. Profile name and click on save

![](https://529847091-files.gitbook.io/~/files/v0/b/gitbook-x-prod.appspot.com/o/spaces%2F3lEcft4Hj193xOMx83Gm%2Fuploads%2FL7kpf2oZiCPBGDGWtVQh%2F18.png?alt=media)

**K. Verify the Message Activity in AMF once the Partner31 uploads the file to SFG via CD protocol. If everything was configured correctly, the file will be delivered to Partner32 via S3 protocol.**

Go to Message activity under Track N Trace

<figure><img src="https://529847091-files.gitbook.io/~/files/v0/b/gitbook-x-prod.appspot.com/o/spaces%2F3lEcft4Hj193xOMx83Gm%2Fuploads%2Fh8KQEAn9fx3dPKxsG5r7%2Fimage.png?alt=media&amp;token=b926f273-71b9-42b0-ae7e-503ee9b972d8" alt=""><figcaption></figcaption></figure>

To see more details of the delivery double click on the record

<figure><img src="https://529847091-files.gitbook.io/~/files/v0/b/gitbook-x-prod.appspot.com/o/spaces%2F3lEcft4Hj193xOMx83Gm%2Fuploads%2Fva52ZJ7Ho81amRZKXRqB%2Fimage.png?alt=media&amp;token=30a3195a-9105-4a69-9931-f757a13aa324" alt=""><figcaption></figcaption></figure>

Here we can see the details for the file delivered to the Partner32.